
Friday, December 27, 2013
A 2 for 1 kind of day
Friday, December 13, 2013
Re-purposing Boxes
Tuesday, December 3, 2013
Our Thanksgiving Menu
Wow did November pass right by!! I can't believe Thanksgiving is done and Christmas is almost here. Thankfully I have almost all of my Christmas shopping done!
I've looked back at the last month and realized that I didn't get much out on the blog. Craziness was happening around here with a birthday and a holiday and just the busy-ness of the season. I do still want to get some yummy fall recipes out so that maybe you will still be able to use them.
Sunday, December 1, 2013
December 2013 Menu
YAY!! I got this months meal plan out when I wanted to. I am so happy that I can share this months plan. Comfort food is now in full swing at our house. That doesn't mean, however, that it is always bad for you. I am so thankful for our large turkey that we got from my husbands father. We will have turkey for awhile!! Some of the meals are the last of the "double" meals I made over the last few months. I am also thankful for the venison that we were blessed with from my in-laws. I hope that tomorrow you enjoy the recipes I plan on posting!!
December Meal Plan
The link above is a word document of this months meal plan. A lot of the recipes came from friends and family recipes and allrecipes.com. I like to get ideas for side dishes fro All Recipes. They have 1000s of recipes that people have uploaded.
Again, be sure to come back tomorrow for a lot of Menu Monday recipes that will be posted!! Hope you enjoy our menu this month.
Happy Cooking!!
Amanda
Friday, November 22, 2013
Pumpkin!! (Cooking)
How to Cook a Pumpkin
Ok, so I know I should have gotten this out right after Halloween because that's when everyone was wondering what to do with their pumpkins. Sorry this is late, but not so late that you can't have some made up in a jiffy for Thanksgiving next week.So you've got this pumpkin and your thinking "what do I do with this thing??". Well you have a few options and really you don't need a whole lot of tools.
Saturday, November 9, 2013
November 2013 Menu
I meant to get this out a week ago but time has passed me by with everything I have had going on. I didn't have much to add to this months menu because I had some double meals from last month and meals I made from last months basket produce. Plus we have a holiday coming up and I will have leftovers from that!! Right now is my favorite season of them all. I love all the fall flavors and produce available, especially pumpkins:) I hope you enjoy what we are enjoying at our table!
Monday, November 4, 2013
Berry Pretty Pork Roast
Now, on with the recipe. We weren't able to have our scheduled dinner last Sunday, so we had it yesterday. I really wanted to try this recipe because we love berries. I have berries in the freezer that we picked in the spring and summer. Just a tidbit, if you make this recipe it is ok to use frozen berries. Nutritiously they are just as good as fresh berries, and are cheaper!! I also saved money by buying the roast in bulk. I have a membership at a local wholesale store and they had a package of two 2.5 lb pork roasts on sale. So I froze them last month. We had one yesterday and one for December.
So again, on with the recipe:
Ingredients:
- 1 whole boneless pork loin roast (about 2.5 lbs)
- 1/2 cup chopped dried plums (prunes)
- 1/3 cup each fresh or frozen blueberries, blackberries and sliced strawberries
- 1 garlic clove
- 1/4 cup butter or margarine, melted
- 1/2 teaspoon dried oregano
- 1/4 teaspoon salt
- 1/4 teaspoon pepper
- 1/2 cup red wine or chicken broth (I used cooking sherry)
- 1 Tbsp brown sugar
- 2 Tbsp strawberry jam (NOT jelly)
1. I start by getting everything ready and within reach. It makes this recipe go a lot smoother.
2. Slice prunes into 4 quarters. Put prunes and rest of fruit in a bowl.

3. Cut garlic clove into slivers.

4. Get yourself a LARGE cutting board to put the roast on; you will need it:)

5. Cut a horizontal slit through the center of the pork roast to within 1/2 in. of the opposite side; open roast so it lies flat.

6. Place fruit on top of the right side of the pork roast.

7. Fold left side of roast over the berries, trying to keep berries contained. Don't worry if some fall out, you can stuff them back in after the next step.

8. Tie the roast securely with kitchen string (or I used thread doubled up).


10. Place in an ungreased shallow baking pan. Drizzle with melted butter. Sprinkle with oregano, salt and pepper.
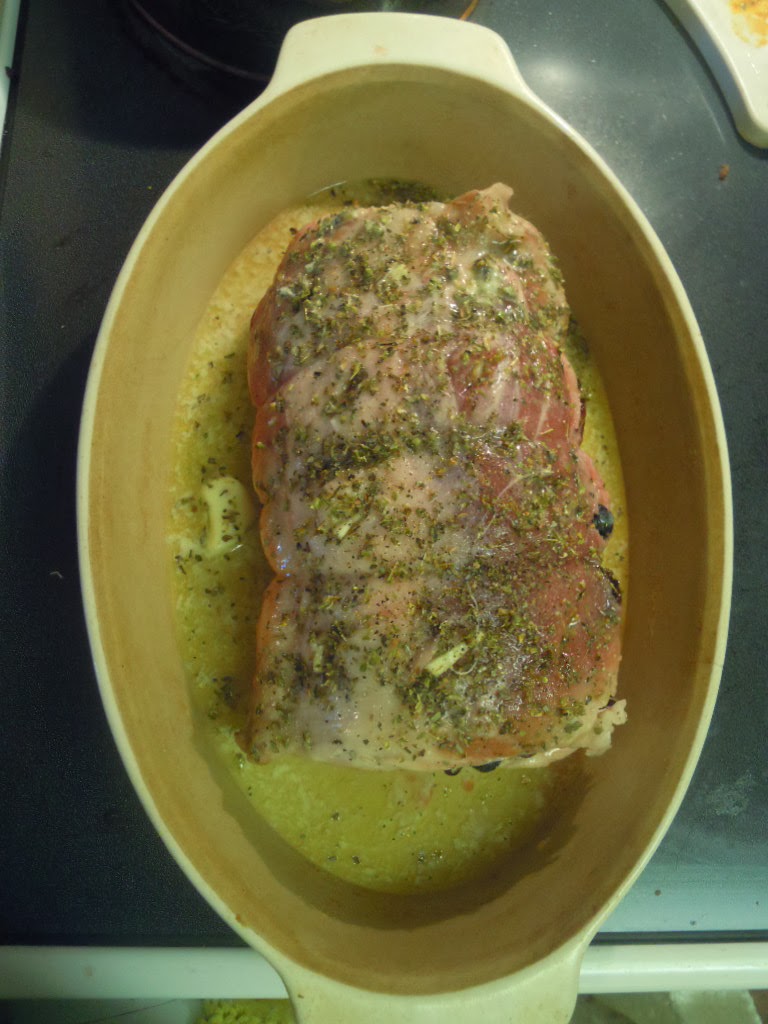
11. In a small bowl, combine the wine or broth, brown sugar, and jam. Drizzle over roast (I took the time to kind of spoon it over so that the spices didn't get poured off).
 | |
| Haha...forgot to take pic before I put it in the oven!! |


13. Let stand for 10 minutes before slicing.
We served this with rice and mashed sweet potatoes. I would definitely say this is a weekend meal because of the prep time and length of time to cook. I do hope that you enjoy this recipe...it kind of gives a last hooray to summer while bringing in the goodness of autumn.
Happy Cooking!!!
Amanda
Friday, October 25, 2013
Dessert is Served...Apple Hand Pies!!
I just love making yummy easy desserts for my family. I usually make dessert when we have an easy dinner or when I have an abundance of something. Well, right now that abundance is Apples. Yep, this goes with the theme right now of in season items.
I made some Apple Hand Pies earlier this week just to experiment and they turned out awesome. So I posted it on my Facebook page just to see if there was any interest and WOW do a lot of people want this recipe. Right now you can find yummy apples almost anywhere. So, go find some that you love and turn them into these yummy hand pies.
I made some Apple Hand Pies earlier this week just to experiment and they turned out awesome. So I posted it on my Facebook page just to see if there was any interest and WOW do a lot of people want this recipe. Right now you can find yummy apples almost anywhere. So, go find some that you love and turn them into these yummy hand pies.
Wednesday, October 23, 2013
Tidbit Tuesday...on Wednesday
The topic this week is...the secrets behind how I feed my family of 4.5 for 6 weeks on $300!!! (I have a step-son who is here part of the time so I count him as .5 on my grocery list)
Most of you have seen my menu for October, so you know what I am having to eat every day. If you haven't, head on over here. You may not know all the ingredients, but you have an idea as to what I need for most of them. And some of my recipes I have already post so you do know some of it.
Most of you have seen my menu for October, so you know what I am having to eat every day. If you haven't, head on over here. You may not know all the ingredients, but you have an idea as to what I need for most of them. And some of my recipes I have already post so you do know some of it.
Menu Monday...on Tuesday
Friday, October 18, 2013
Italian Sausage & Lentil Stew
Today's post is all about freezer cooking. I learned about this 2 years ago when I was pregnant with my daughter. WOW is all I can say. Learning this has taken a lot of hassle out of dinner. I've even learned how to save big bucks with this technique. If it is a meal we really like, then I double the recipe and freeze half. If it is a big meal (serves more than 4-5) then I automatically divide into 2 smaller pans and freeze half!! Wow...where was I when all this information first came out??
So today I give you one of my family's favorite winter stew...because it is keeping with the tradition of the week: IN SEASON!!
Ingredients:
1. Spray a skillet with cooking spray and heat over medium-high heat. If sausage is still in casing, removing casing. Cook sausage like you would cook ground beef, making sure it's well browned. Pour off any fat.
2. Put sausage in a large pot (I use my trusty stockpot). Add carrots, onion and garlic and cook until vegetables are tender.
3. Stir in the broth, oregano, bay leaf, potatoes and lentils. Heat to a boil. Reduce heat to low. Cover and cook for 40 minutes.
4. Meanwhile, grab leaves from the kale bunch and pull the leaves from the main vein (each leaf will have a tough main section going down the middle, known as the vein. If you don't like it, then pull the leaf away from it). Coarsely rip the leaves and set in a bowl to the side.
5. When 40 min is done, dumb the Kale on top of the stew and put lid back on. Set timer for 5-7 minutes more or until Kale is slightly wilted. Stir Kale into stew. **Remember, before you serve or freeze, REMOVE THE BAY LEAF**
Like I mentioned, we love this stew. The only thing the little ones sometimes pick out is the Kale. We usually serve ours with bread and butter or dinner rolls.
TO FREEZE:
Let stew cool in pot and then divide between plastic containers. Label and freeze. To reuse, thaw in fridge overnight and then just throw in a pot at dinner time until heated up.
I hope you enjoy this recipe, as the weather is getting cooler. Kale is a wonderful leafy green, in season right now, that is very delicious and healthy for you. We actually got a bunch in our CSA basket today!! If you missed my post on CSA's, click here!!
Happy Freezing!!
Amanda
So today I give you one of my family's favorite winter stew...because it is keeping with the tradition of the week: IN SEASON!!
Ingredients:
- 1 lb sweet Italian sausage
- 2 large carrots, sliced (in season)
- 1 large onion, chopped (about 1 cup)
- 2 cloves garlic, minced (I use my garlic press, it's just easier)
- 4 cups Chicken or Vegetable broth
- 2 tsp dried oregano leaves or 2 Tbsp chopped fresh oregano
- 1 bay leaf
- 2 cups cubed red potatoes (in season)
- 1 cup dried Lentils
- 1/2 bunch fresh Kale (in season)
1. Spray a skillet with cooking spray and heat over medium-high heat. If sausage is still in casing, removing casing. Cook sausage like you would cook ground beef, making sure it's well browned. Pour off any fat.
 |
| Sausage with casing removed |
 | |
| Sausage fully cooked |
2. Put sausage in a large pot (I use my trusty stockpot). Add carrots, onion and garlic and cook until vegetables are tender.
 |
| My trusty Stockpot!! |
 |
| My garlic press I use for "minced" garlic |
 |
| with everything added together |
4. Meanwhile, grab leaves from the kale bunch and pull the leaves from the main vein (each leaf will have a tough main section going down the middle, known as the vein. If you don't like it, then pull the leaf away from it). Coarsely rip the leaves and set in a bowl to the side.
 |
| what a bunch of Kale looks like |
5. When 40 min is done, dumb the Kale on top of the stew and put lid back on. Set timer for 5-7 minutes more or until Kale is slightly wilted. Stir Kale into stew. **Remember, before you serve or freeze, REMOVE THE BAY LEAF**
 |
| Just dumb Kale in |
 |
| after 5-7 min, Kale looks wilted |
 |
| Finished stew!! |
Like I mentioned, we love this stew. The only thing the little ones sometimes pick out is the Kale. We usually serve ours with bread and butter or dinner rolls.
TO FREEZE:
Let stew cool in pot and then divide between plastic containers. Label and freeze. To reuse, thaw in fridge overnight and then just throw in a pot at dinner time until heated up.
 |
| I got 2 dinners and 1 lunch!!! |
I hope you enjoy this recipe, as the weather is getting cooler. Kale is a wonderful leafy green, in season right now, that is very delicious and healthy for you. We actually got a bunch in our CSA basket today!! If you missed my post on CSA's, click here!!
Happy Freezing!!
Amanda
Wednesday, October 16, 2013
Creamy Waldorf Salad
Ok, so this deliciousness was just too good to keep to myself. I just have to share it!!
I've been talking about cabbage for the last few days and how it is in season right now. As I have said, we have had an abundance of it and I've been making lots of yummy things with it. Other items currently in season are Apples and Grapes. Yep, I have an overload of apples (which I need to start preserving) from our basket. You might also find that grapes are at amazing prices right now. I know in my area we have U-pick grape vineyards. So because of all these wonderful items, I give you my recipe for Creamy Waldorf Salad (my family loves this; every one of us)!!!
I've been talking about cabbage for the last few days and how it is in season right now. As I have said, we have had an abundance of it and I've been making lots of yummy things with it. Other items currently in season are Apples and Grapes. Yep, I have an overload of apples (which I need to start preserving) from our basket. You might also find that grapes are at amazing prices right now. I know in my area we have U-pick grape vineyards. So because of all these wonderful items, I give you my recipe for Creamy Waldorf Salad (my family loves this; every one of us)!!!
Tuesday, October 15, 2013
Tidbit Tueday
Tidbit Tuesday is a series I'm going to try to do every Tuesday to give you some ideas on how to either save money or make your life simpler, or a little of both!!
LOCAL, IN SEASON
We have a saying here where I live: Buy Fresh, Buy Local. It couldn't be more true, especially with today's prices at the grocery store. I love supporting my local farmers and my kids love going to the local farm market (which for us is open year round!!). We are able to find whatever is currently growing fresh from the local fields in our area, plus we know that we are helping to support small farmers just trying to make a living.Monday, October 14, 2013
Baked Egg Rolls
Menu Monday is going to be a series that I repeat every Monday. I'm going to showcase whatever recipe is on my menu for the current Monday.
Today just happens to be: Egg Rolls and Rice (no veggie because there is veggie enough in the egg roll)
These are fairly easy rolls to make. I buy the egg roll wrappers in the refrigerated section of the produce area. Each package costs me about $2 for roughly 20 wrappers. That's not bad. I also double this recipe because we like it and this time of year it is really easy to make because of the seasonal veggies. Just remember, you can do your own substitutions if you don't like Chickpeas (pork, chicken, a different bean, etc.). The chickpeas can be either canned or dried that you then must cook.
Before starting, decide whether you are going to cut up a head of cabbage, or use bag coleslaw mix. Frankly, I like the fresh cabbage (and I'm not a cabbage person). It just tastes better. There are 2 different ways to cut cabbage.
 |
| Using saw Knife to cut finely. |
 | ||
| Using cheese grater to grate. |
If you have never seen egg roll wrappers, here is a photo of the one's available at my grocery store. I am not specifically endorsing this company. Picture just taken to show you a sample.

Let's get started!!
Ingredients:
- 2 cups finely chopped, cooked chickpeas
- 1 tablespoons finely minced garlic
- 2 teaspoons grated fresh ginger or 1/8 tsp ground ginger
- 2.5 cups shredded Cabbage or bag of Coleslaw mixture w/carrots
- 0.75 cups shredded carrots (omit if using bag mixture)
- 0.5 cups finely chopped onion
- 2 teaspoons sesame seeds
- 1 teaspoons freshly ground black pepper
- to taste Crushed red pepper flakes to taste (optional)
- 0.25 cups soy sauce
- 2 tablespoons sesame oil
- egg roll wrappers
Directions:
Preheat oven to 400 degrees In a large skillet, sauté the onion until it turns translucent, but do not allow it to brown. Add the garlic and ginger and cook 30 seconds. Add remaining vegetables and cook until softened. Season with black and red peppers (optional) and add sesame seed. Add chickpeas and combine. Once the chickpeas are hot, add in soy sauce and cabbage, a handful at a time, mixing well after each addition. Once the cabbage has wilted, remove the skillet from the heat.
Here is what the combination looks like:
 |
| mmm...Yum!! |
Next, these were my tools for assembly. Have your cookie sheet, or whatever you will cook them on, nearby. In the small bowl is water for dipping your finger into when sealing the wrappers.

To assemble, lay out an egg roll wrapper on the counter.

Place about 2-4 Tbsp of the chickpea and veggie mixture onto the wrapper.

Fold up the bottom corner. and then fold in the left and right side corners towards the center.

Using your finger, brush the remaining (top) corner with a little water and roll.


Now, since I doubled this recipe, I got a lot more eggrolls then just the 8 I did for dinner. I got a total of 29, including what we ate tonight. That left me with 2 more meals of 8 and one meal of 5. If you double the recipe, that is roughly one head of cabbage and 1 fat carrot shredded. VERY cost effective for 4 meals.
Freezing Directions:
Prepare rolls WITHOUT BAKING. Flash freeze on cookie sheet (this means put them in the freezer on cookie sheet for 30 min to an hour; they should be solid when you check them). Divide among gallon freezer bags and freeze. To serve: Thaw. Bake at 400 for 15 minutes. Spritz with oil and bake another 5 minutes. | |
| Two 8 count bags and one 5 count bag!! |
Amanda
Subscribe to:
Posts (Atom)